First published in Cat House & Shooting Society in Medium on 10/25/2025

Last year, I wrote about finally making the perfect gluten-free bread by adapting the recipe from King Arthur Baking Company to use Bob’s Red Mill 1-to-1 Baking flour.
It was a recipe I’ve since used repeatedly, and I loved it. However, after being laid up for most of this year due to knee replacement surgeries and recovery, when the local county fair was announced, I had the urge to enter the baking competition. A year or two ago, they added a gluten-free class, and I’ve been wanting to try my hand at it.
I decided I was going to enter my bread, snickerdoodles, and try my hand at pumpkin bread—all gluten-free, of course. I also entered the only gluten-free huckleberry blonde brownie entry to the huckleberry challenge. I’ll write about those later; this is about my bread.
I needed to look at tweaking my recipe and seeing how I could make it better. I decided to see what adjusting the amount of xanthan gum would do.
I left out the xanthan gum with the 1st test loaf, relying on the xanthan gum already in Bob’s 1-to-1. It baked up fine, but using my non-gluten-free hubby as a test subject, I decided the texture wasn’t right. The slices were too delicate and tended to fall apart. The hubby also said the crusts were too dry.
I went the other way and reduced the amount I would have added to 3 grams (3/4 tsp) from 4 (1 tsp). I then tried it with 1 gram (1/4 tsp). Not bad, but then I tried it with 2 grams (1/2 tsp) and it was exactly what I’ve been looking for.
I also went from 227 grams (1 cup) of sourdough starter to 230 grams (a bit over 1 cup). It’s amazing what difference 3 extra grams can make. Plus, I also made sure Henry was freshly fed and burbling away happily when I measured him out.
Hubby usually finds the crust a bit on the dry side. I don’t have problems with that, but I brushed the loaf with melted butter once it was out of the oven. The hubby gave it four thumbs up.
I made a loaf of bread the day before I had to turn it in to the fair for judging. I didn’t brush it with butter since I wasn’t sure exactly when it would be judged, and the last thing I needed was the butter going off and poisoning the judges.
I won a blue ribbon. SQUEEEEEEEEEEEEEEEEEEEEEEEEEEEEEEEE!!!!!!
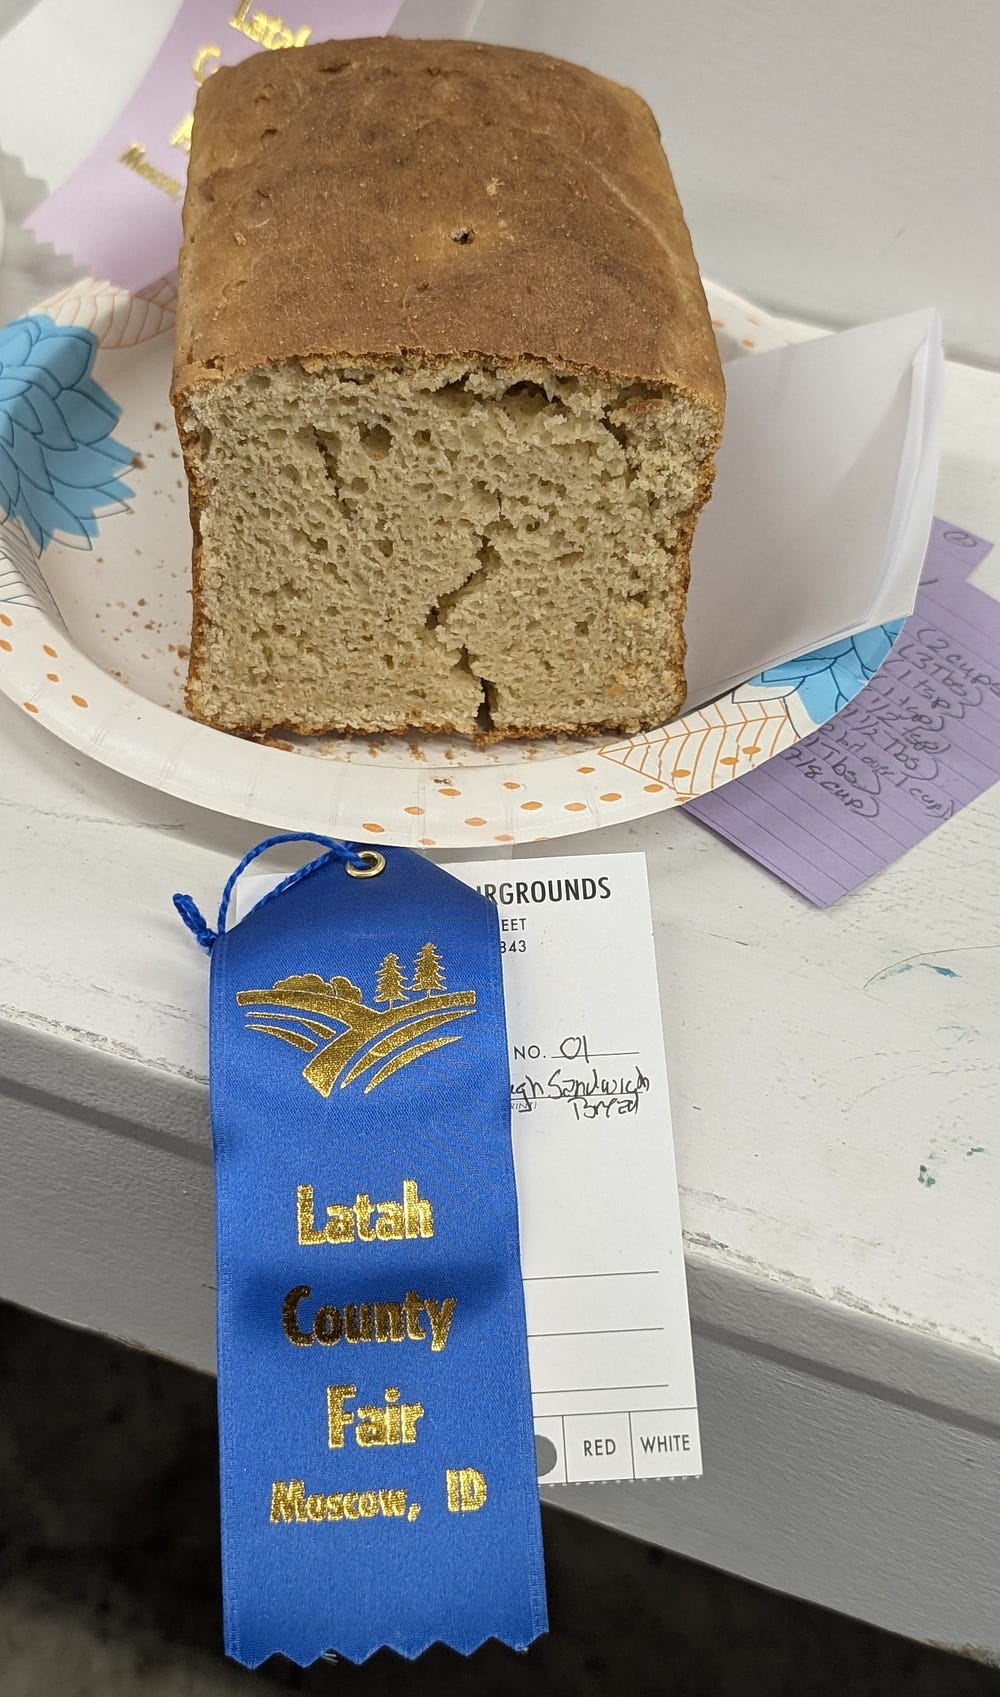
I’m not exactly sure why it cracked like that. I can only assume it was from sitting out and unwrapped for two days before I got to the fair to see how I did.
I finally found the perfect recipe. But of course, I can’t leave anything alone. I know some bakers let their sourdough bread rest in the fridge overnight to let the yeast do its thing at a slower rate. So I decided to give it a try.
I’ve started making my bread in the late afternoon and putting it in the oven with the light on for the first rise of 90 minutes. Then I turn it into the bread pan, cover it with plastic wrap, and put it into the fridge overnight.
I take it out the next morning and let it warm up in the oven with the light on before baking.
NOM!!!! The flavor is more sourdough than if I did the 1-hour rise and baked it the same day.
So, here is my new, improved recipe for gluten-free sourdough sandwich bread:
Ingredients:
312 gr (2 cups) Bob’s Red Mill GF 1-to-1 Baking Flour
35 gr (3 Tbs) sugar
5 gr (1 tsp) yeast
6 gr (1 tsp) salt, kosher
2 gr (1/2 tsp) xanthan gum
35 gr (4 1/2 Tbs) powdered milk
230 gr (a bit over 1 cup) GF sourdough starter, freshly fed
57 gr (4 Tbs) butter, softened
170 gr (7/8 cup) water
3 eggs, large
Directions:
Whisk the flour, sugar, yeast, salt, powdered milk, and xanthan gum in the mixing bowl until well blended.
Slowly drizzle the water into the dry ingredients, using a stand mixer or an electric handheld mixer to mix it in. It will look crumbly at first, but it will come together when the liquid is fully added.
Add the starter and the softened butter to the dough and blend on low until combined. It will be a stiff dough.
Add the eggs, one at a time, and mix until blended before adding the next egg. The dough will loosen up. Once the last egg has been blended in, increase the speed of the mixer to high for 3 minutes, stopping and scraping down the sides once or twice, until the batter is thick and smooth.
Cover the bowl and put it in a warm place for 90 minutes until it has almost doubled. It will look puffy.
Grease a 9"x4"x4" Pullman sandwich pan. If the pan has air holes at the bottom, cut a piece of parchment paper to cover them. Scoop the batter into the pan and gently smooth the top with wet fingers or a spatula.
At this point, you can either loosely cover and place in a warm place for another 60 minutes until the dough has risen almost to the rim of the pan, or place in the refrigerator overnight to slow rise.
If you go the overnight method, allow the dough to warm to room temperature before baking.
Preheat the oven to 350°F (177 °C). Bake the bread for 40–45 minutes, or until it reaches an internal temperature of 210°F (99 °C).
Turn bread out onto a cooling rack and brush with melted butter.
Let it cool completely before slicing.

Depending on the time, I will most likely use the overnight method for most of my bakes. There will be times when I wake up in the morning and decide I need to bake a loaf of bread to take to a gathering or two. It’s nice to have options.
I try and use up a loaf as fast as possible. GF breads tend to dry out quickly. So I’ve started to slice the loaves and wrap the bread up in two slice packages and pop them in the freezer. When I want to use them, I pull out a package or two, thaw them in the fridge if I’m not planning on eating them right away, or thaw them in the microwave. Now I always have bread when I want it.
I still haven’t bought a decent bread slicer, though.
If you enjoyed this article, please consider buying me a coffee. It would be very much appreciated :)
Comments