food that is LOL!
After a 2 year break, I am getting a garden started again. I had found an idea of using 2 liter and 2.5 liter soda bottles for making little greenhouses to start my seeds. So this year I started saving bottles again.
The 2L bottles will have the potting soil and seeds, while the 2.5L bottles will be the greenhouses.
Gather everything you need and then start by removing the labels from all the bottles and rinsing them out if they haven't already.
I then poke a pilot hole using a knife or similar sharp object. I cut the bottle in half (tho you will want to make sure the rim of the bottom half of the 2.5L will be below the 2L bottom when you nest them together.
Once all the bottles are cut, I drilled holes in the bottom of the 2L bottles for drainage. Fill most of the way with potting soil. I also add some plant food pellets.
Now that all the pots have been prepped, I make labels for everything I am starting. I put them on pots as I go so the pot is labeled with the right seeds. I've mostly tomatoes at the moment, plus 1 pot of Black Beauty eggs plants and 1 with the California Wonder Sweet Pepper. I also have some mystery seeds. I am thinking , but we will see what sprouts LOL!
The first time I did this I put the labels on the 2.5L bottles, then somehow during the spring got the pots inside mixed up.
Once everything is seeded and labeled, I then water them and pop the tops on. Remember I said to cut the outer bottle so the inner pot sticks above the rim? This is so the top stays on.
Now you just need to find a warm well lit spot to put your little greenhouses and wait for things to grow. Once the plants are tall enough you can remove the lids. When they get even bigger you can then transplant them into larger pots and eventually out to the garden in the ground or a suitable container if you are container gardening.
I so can't wait for Spring and summer to get here, I am looking forward to fresh tomatoes and other veg to cook with. Not too mention finding out what the mystery seeds are!
The 2L bottles will have the potting soil and seeds, while the 2.5L bottles will be the greenhouses.
Gather everything you need and then start by removing the labels from all the bottles and rinsing them out if they haven't already.
 |
| Bottles, knife, scissors, label maker and drill |
I then poke a pilot hole using a knife or similar sharp object. I cut the bottle in half (tho you will want to make sure the rim of the bottom half of the 2.5L will be below the 2L bottom when you nest them together.
 |
| Getting started |
 |
| Cutting to size |
 |
| Tops and bottoms of the mini greenhouses. |
Once all the bottles are cut, I drilled holes in the bottom of the 2L bottles for drainage. Fill most of the way with potting soil. I also add some plant food pellets.
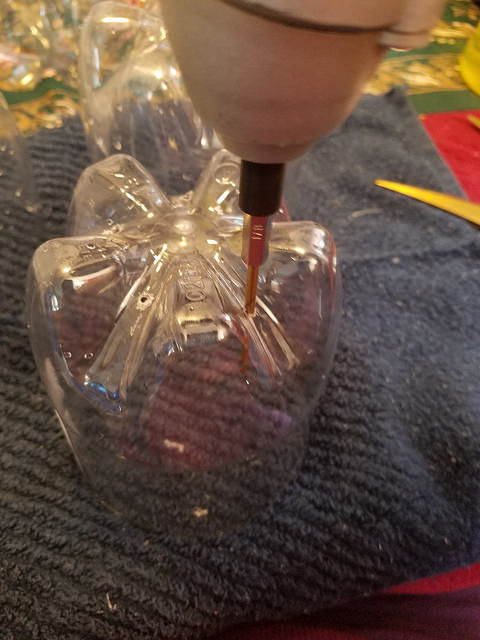 |
| Drilling the drain holes |
 |
| Pots all prepped and ready to plant. |
 |
| This is what I use, I find it to be pretty good and easy to use. |
Now that all the pots have been prepped, I make labels for everything I am starting. I put them on pots as I go so the pot is labeled with the right seeds. I've mostly tomatoes at the moment, plus 1 pot of Black Beauty eggs plants and 1 with the California Wonder Sweet Pepper. I also have some mystery seeds. I am thinking , but we will see what sprouts LOL!
 |
| A nice variety of tomatoes. |
 |
| Mystery seeds. Wonder what they will be? |
 |
| Seeds ready to be buried in the soil. |
The first time I did this I put the labels on the 2.5L bottles, then somehow during the spring got the pots inside mixed up.
 |
| The inner pot is taller than the outer one. |
 |
| 1 down, more to go |
Now you just need to find a warm well lit spot to put your little greenhouses and wait for things to grow. Once the plants are tall enough you can remove the lids. When they get even bigger you can then transplant them into larger pots and eventually out to the garden in the ground or a suitable container if you are container gardening.
 |
| All set to grow |
I so can't wait for Spring and summer to get here, I am looking forward to fresh tomatoes and other veg to cook with. Not too mention finding out what the mystery seeds are!
Comments